Wifi-Mananger not starting in OpenMQTTGateway 0.9.16 NodeMCU ESP8266?

Hello,

Latest VSCode 1.71.2
Latest PlatformIO IDE 2.5.4
Latest OpenMQTTGateway 0.9.16

When built and uploaded, NodeMCU ESP8266 is flashed with no errors. However, WiFiManager does not seem to run/boot, OpenMQTTGateway SSID does not show and Wifi-Mananger menu cannot be accessed.

When
# define ESPWifiManualSetup true
is set
OpenMQTTGateway directly connects to home Wi-Fi and starts pushing data to MQTT broker.

So maybe there is an issue with Wifi-Manager at all?

Two little additions here:

Device info shows [“RF”] Is that the way it is expected to show?

# define OMG_VERSION "version_tag"
to
# define OMG_VERSION "0.9.16"
and version will show - no issue at all.

Thank you in advance.

Hello,

Which configuration of the gateway are you using ?

I was able to upload nodemcuv2-rf to an esp8266 through the web uploader and have the wifi manager to enter the credentials.

Sorry, I should have added that info. Option 3 Upload your own configurations, because I have SRX882 and I have to use D1 because D3 is not working. So the only option is then Option 3. I uploaded nodemcuv2-rf to an NodeMCU ESP8266 and with the manual configuration (not the WiFi-Manager) it works. I can provide as much feedback, logs or testing as needed.

Thank you in advance,

And if you use Option 1, do you get the wifi manager portal (I understand that RF will not work, but just as a test)

Yes, that was the first thing I tried:

option 1, flash via web ok, wifi-manager ok, OMG pushing messages to broker ok, 433Hz messages received NO beacuse of issue with pin D3 not working so I had to use option 3

And then, option 3, edit OMG source files (version tag, Wi-Fi ssid and pwd, mqtt user pwd, topic, change gpio value) in VSCode ok, flash ok, wifi-manager Not working, 433Hz messages received Yes.

Hope this clarifies and thank you.

So with option 3 and entering the WiFi and MQTT credentials manually, you also defined

'-DESPWifiManualSetup=true'

for these manual WiFi and MQTT credentials to be picked up.

In this case there will be no WiFi Manager to enter these credentials at the initial start up of OMG, as they are already defined and applied manually.

Is this the situation when you were still expecting WiFi Manager?

What happens with option 3 if you do NOT define / comment out again

# define ESPWifiManualSetup true

This should allow WiFi Manager to start again as expected at the initial startup after an upload.

Thank you for your reply and interest as well. In the end and after many more tries, I have gone back to basics. So starting from fresh, unzipping OpenMQTTGateway-0.9.16.zip and making as few changes as possible in an attempt to trigger WiFi-Manager to show SSID.

Test 1 # Brand new OpenMQTTGateway-0.9.16.zip extraction, all files new and DESPWifiManualSetup=true is NOT defined in platformio.ini in order to force SSID / WiFi-Manager

platformio.ini
;default_envs = nodemcuv2-rf

changes to
default_envs = nodemcuv2-rf

User_config.h
#  define OMG_VERSION "version_tag"

changes to
# define OMG_VERSION "0.9.16"

So that SRX882 D1 pin can used…

config_RF.h
#    define RF_RECEIVER_GPIO 0 // D3 on nodemcu // put 4 with rf bridge direct mod

changes to
# define RF_RECEIVER_GPIO 5 // D3 on nodemcu // put 4 with rf bridge direct mod

Test 1 result # Compile, build, upload OK but no SSID / WiFi-Mananager to connect to

Please, kindly let me know if I am missing a step or any other change should trigger WiFi-Manager. I can test extensively.

Thank you once more

Hi @mixpc,

please make sure to erase your ESP8266’s flash before uploading the environment described above.

It sounds as if you still have some previous, possibly only partial WiFi/MQTT settings stored in flash which the ESP8266 is trying to connect to, hence not starting WiFi Manager.

To verify, instead of just uploading, chose Upload and Monitor. There you will see if it tries to connect to WiFi or an MQTT broker. What you should, and very likely will see after a flash erase, will be something like:

N: Connect your phone to WIFI AP: OpenMQTTGateway_ESP8266_RF with PWD: your_password
…
*wm:[1] StartAP with SSID:  OpenMQTTGateway_ESP8266_RF

Thank you for your feedback once more. Is there a way to flash erase nodemcu8266 via vscode+platformio ? As I don’t know, this is what I did:

===== step 1

esptool.py --port COM4 --baud 115200 --after no_reset write_flash --flash_size detect --flash_mode dio 0x00000 C:\Users\myuser\nodemcuv2-rf-firmware.bin --erase-all

esptool.py v3.0
Serial port COM4
Connecting....
Detecting chip type... ESP8266
Chip is ESP8266EX
Features: WiFi
Crystal is 26MHz
MAC: 5c:cf:7f:53:bA:0a
Uploading stub...
Running stub...
Stub running...
Configuring flash size...
Auto-detected Flash size: 4MB
Erasing flash (this may take a while)...
Chip erase completed successfully in 6.2s
Flash params set to 0x0240
Compressed 580688 bytes to 411283...
Wrote 580688 bytes (411283 compressed) at 0x00000000 in 36.4 seconds (effective 127.7 kbit/s)...
Hash of data verified.

Leaving...
Staying in bootloader.

Firmware successfully flashed. Unplug/replug or reset device 
to switch back to normal boot mode.

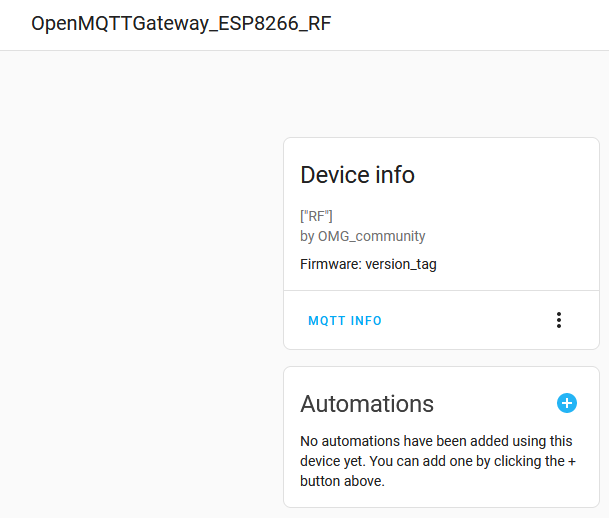
Result: OpenMQTTGawteway_ESP8266_RF SSID shows and Wifi-Manager can be accessed

===== step 2
flash source code (with edits described in my previous post) via vscode+platformio

Writing at 0x00060000... (96 %)
Writing at 0x00064000... (100 %)
Wrote 580704 bytes (411321 compressed) at 0x00000000 in 36.4 seconds (effective 127.7 kbit/s)...
Hash of data verified.

Leaving...
Hard resetting via RTS pin...
================================================================================================= [SUCCESS] Took 47.80 seconds =================================================================================================
--- Terminal on COM4 | 115200 8-N-1
--- Available filters and text transformations: colorize, debug, default, direct, esp8266_exception_decoder, hexlify, log2file, nocontrol, printable, send_on_enter, time
--- More details at https://bit.ly/pio-monitor-filters
--- Quit: Ctrl+C | Menu: Ctrl+T | Help: Ctrl+T followed by Ctrl+H
N: Connect your phone to WIFI AP: OpenMQTTGateway_ESP8266_RF with PWD: your_password
*wm:[1] AutoConnect
*wm:[1] No Credentials are Saved, skipping connect
*wm:[2] Starting Config Portal
*wm:[2] AccessPoint set password is VALID 
*wm:[2] Disabling STA
*wm:[2] Enabling AP
*wm:[1] StartAP with SSID:  OpenMQTTGateway_ESP8266_RF
*wm:[1] AP IP address: 192.168.4.1
*wm:[1] Starting Web Portal
*wm:[2] HTTP server started
*wm:[2] Config Portal Running, blocking, waiting for clients...
*wm:[2] Portal Timeout In 120 seconds

Result: OMG with custom edits to source file successfully flashed, SSID showing and WiFi-Manager running as well. Excellent! Subscribing to broker shows:

Message 163 received on home/OpenMQTTGateway_ESP8266_RF/version at 9:08 AM:

0.9.16

QoS: 0 - Retain: false
Message 162 received on home/OpenMQTTGateway_ESP8266_RF/LWT at 9:08 AM:

online

QoS: 0 - Retain: false

So excellent!

Now, for consideration:

  1. If you know of a way to flash erase nodemcu8266 via vscode+platformio I would thank you for sharing the info. Otherwise, I managed to get it working via my “workaround”.

  2. I think in (Option 3) Upload your configurations, at the beginning of Configure & Upload with PlatformIO, there should be a sentence that reads:

If the board (NodeMCU8266…) has been previously flashed and in your current setting you would like to use Wifi-Manager, you are strongly encouraged to erase flash the board before uploading your configuration. To achieve that, please flash your board as described in (Option 2) Upload ready-to-go binaries. You can proceed with the steps described in this section only after successful erase flashing.

Maybe there is no need for 2) I mean, there are really advanced users who do not need that. I’m taking a broader perspective here considering all sorts of users. But I could edit that page so that you/admin can later edit/review/approve. Please, let me know.

Two doubts here and no more.

  1. Is Auto discovery enabled by default? The monitor window in vscode shows
    N: OpenMQTTGateway modules: ["RF"]
    shouldn’t it be showing something like
    N: OpenMQTTGateway modules: ["RF+HADiscovery"]
    I have already enabled Auto discovery in my MQTT integration. However, in Auto discovery section
With platformio you can deactivate discovery by adding:

'-UZmqttDiscovery="HADiscovery"'

So this makes me think Auto discovery is enabled by default. Or must it be enabled/forced in platformio.ini
[env:nodemcuv2-rf] ?

  1. When I force the PIR sensor (wave hand) the following message is published:
Message 95 received on homeassistant/device_automation/5AA375CBBA0A--4645868-RF/config at 10:14 AM:

{
    "automation_type": "trigger",
    "type": "button_short_press",
    "subtype": "turn_on",
    "topic": "home/OpenMQTTGateway_ESP8266_RF/433toMQTT",
    "device": {
        "identifiers": [
            "5AA375CBBA0A"
        ],
        "via_device": "OpenMQTTGateway_ESP8266_RF"
    }
}

That same value 4645868 is shown by entity sensor.gatewayrf
I expected a new entity to be automatically created such as maybe sensor.4645868 or sensor.5AA375CBBA0A so that I can add it to the dashboard or make automations. So with that message, what would be the way to make use of it?

Thank you once more.

I usually just do a flash erase separately in VSC and Platformio in its terminal window with

esptool.py --port COM4 erase_flash

or

platformio run --target erase

there even is a project task to erase the flash for each environment, but this, and the last option, currently don’t work for me. With all the project task issues recently though, I assume it’s still to be addressed.

Then upload one of my custom builds.

That same project task environment list I also wanted to point out to you when I read you comment above about

with all environments being listed on the left side under project tasks, there is no need for this. There are all the tasks for Clean/Clean All, building, uploading … with you amending some environments for your own customisation, it might also be worth looking into creating your own environment list in a separate file, as described in

and exampled in the included prod_env.ini.example file - just a thought :slight_smile:

Please feel free to submit any changes and additions to the documentation, which you think will improve it for better understanding and problem avoiding/solving. Any PRs on GitHub with such additions are very welcome.

With the auto-discovery it will be better if someone else replies to your specific queries here, as I don’t use auto discovery at all and also don’t use HA as my controller, but yes, it is enabled by default, as I had to

'-UZmqttDiscovery="HADiscovery"'

to disable it for all my gateways :wink: It not showing up as a module is likely due to the fact that only protocol relevant modules, like RF, IR etc. are shown there.