Anyone is able to flush OMG on Sonoff RF Bridge R2 v2.2 ?
Unfortunately I’m unable to enter the esp to download mode. According the thread below i do see folk are able to flush it with Tasmota:
I did try to revert RX and TX , did try holding pairing button with no success. No hw modifications performed.
I’m in the same boat. Did you manage to solve it? I’ve tried various incantation, switched rx and tx so thay match insted of being crossed, pressed the button at boot, all the time, I’m running out of options.
At this stage I’m wondering if the interface works, I bought the one linked from tasmota guide on AliExpress, but I trust it minimally… It creates a serial port when plugged on my mac, but it doesn’t seem to communicate with the ESP.
Hi, are there any news? I struggle to set up OMG (the hotspot is being generated but after typing in the Wifi and mqtt credentials the Bridge doesnt seem to boot)
Hi there.
Today I received my FTDI and I was able to flash tasmota-DE.bin (v13.0.0) on first try.
I’ll try to explain how I made it.
IMPORTANT:
Don’t use Front USB Port or an extension cable. Hit the FTDI directly to the Mainboard USB. These chinese FTDI-PCB’s are not shielded and the cables you will use are antennas for interferences by your PC.
Don’t plug in a Micro USB to the RF-PCB.
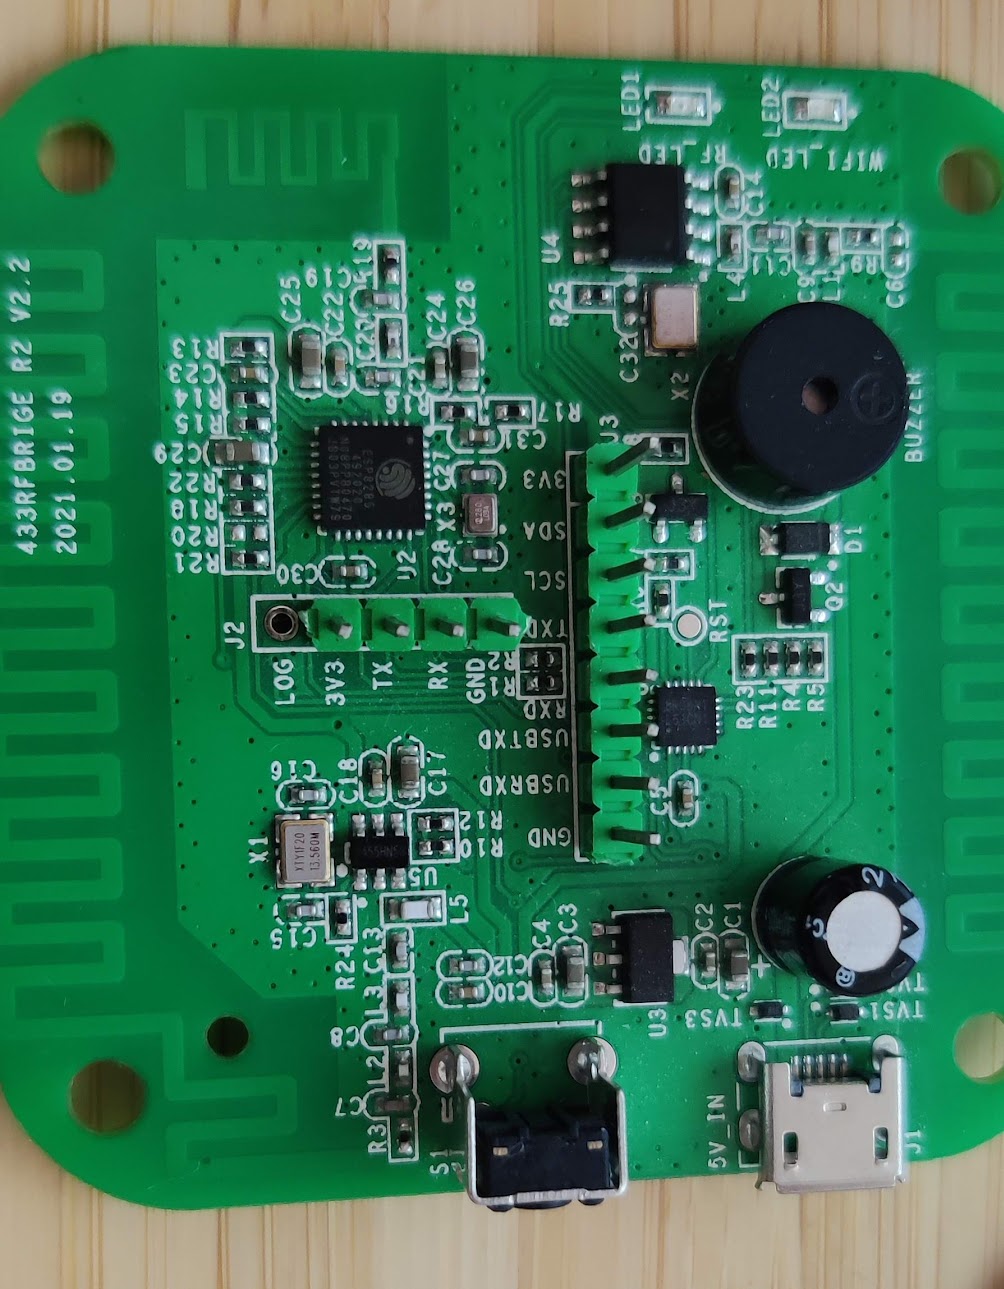
(Optional) I soldered a 4 pin socket to the PCB (J2), so it’s much easier to hold the connection cables.
Connect the FTDI to J2:
3V3 ↔ 3V3
RX ↔ TX
TX ↔ RX
GND ↔ GND
LOG will not be used
Start Tasmotizer, select COM-Port and your prefered Tasmota version (1MB). To save the original firmware also hit Backup.
While holding the pairing Button you need to plug in the FTDI to your Computer.
If the connection to your PC is fine, the blue LED on the PBC must not light up, you can release the pairing Button. Otherwise disconnect wait a few seconds and retry.
Hit “Tasmotize!”
After a sucsessful flash, disconnect everything and powerup the RF Bridge by the Micro USB Port.
Search for a hotspot called “tasmota…”, connect to it, open up your webbrowser and set up your local WIFI connection.
Now you’re able to connect the RF Bridge via your LAN.